
Quite often you need to use an external hard drive (or USB stick) in a mixed environment (both on Mac and Windows based computers). By default, most hard drives you purchase will NOT allow you to do this. Generally they will ship in a way that allows you to read and write files under windows (copy files onto and off the drive), but you’ll only be able to read those files under the Mac environment (and not copy files back onto the drive). This is to do with the way the manufacture sets up the drive at the factory. There are different ways a drive can be set up. This is referred to as the way the drive is formatted.

Most (not all) drives you purchase these days will be formatted using NTFS. This is the default system used by all modern Windows computers. Since most people are using Windows, most manufactures stick with this format. Macintosh computers use a different file format known as HFS+. Any external hard drive you purchase that states “for Mac” on the box is likely set up this way.
More after the break…
While there are ways around it, by default NTFS can be read and written to under Windows, and read by not written to under Mac. HFS+ will only work under a Mac and can’t be read or written to under Windows. (again, there are ways around this, but for the sake of simplicity this is how it is).
There is a third “common” file format that will work for reading and writing files on BOTH Mac and Windows machines. This system is called FAT (File Allocation Table). If you “reformat” your external hard drive in this format, it will allow you to move the drive back and forth between Mac and Windows computers. Reformatting is a relatively simple process and doesn’t physically change anything about your drive. It just changes the way a computer interacts with the drive.
So if FAT works on both platforms, why on earth don’t manufactures ship ALL their drives this way? FAT is an old file system and thus has some limitations (which is why newer systems like NTFS were developed). Many of these limitations won’t affect most people, but there are a couple to be aware of before you reformat. The first limitation is a 4GB file size limit. You can store more than 4GB worth of files on a FAT formatted drive, but no INDIVIDUAL file can exceed 4GB. Not long ago, the idea of a file that was more than 4GB was laughable to most people, however these days it could be a real limitation. I teach students working with digital video files and these can creep up to or over this limit. High definition movies can often be larger than 4GB. That being said however, MOST people will never get anywhere near this limitation and newer digital video camera actually record in a format this is generally SMALLER than the older standard definition formats were. (In the case of consumer video cameras.)
The other limitation applies to people who use a Mac as their primary machine and keep backup using Time Machine (always good practice!). If you format your drive in FAT, then it won’t work with Time Machine. You’ll need to use a separate drive (or do some things beyond the scope of this tutorial) if you want to continue using Time Machine AND have a drive to use on Mac and Windows machines.
So that covers the background, how do you actually go about setting up the drive to work cross platform? Before we get into the first step, there is a BIG POINT I want to make (and I’ve seen students burned by ignoring this before).
MAKE A BACKUP OF ALL IMPORTANT DATA ON YOUR DRIVE BEFORE YOU DO THIS!
Reformatting will ease/delete/wipe EVERYTHING on your drive. You won’t be able to get it back without investing some serious time or money. Make a copy of everything you want to keep by placing it in a folder on your desktop, or on another drive. You can copy it back onto the newly formatted drive once you’re done.
Finally, if you’d prefer a video of the process, please click here.
Plug your drive into a Mac
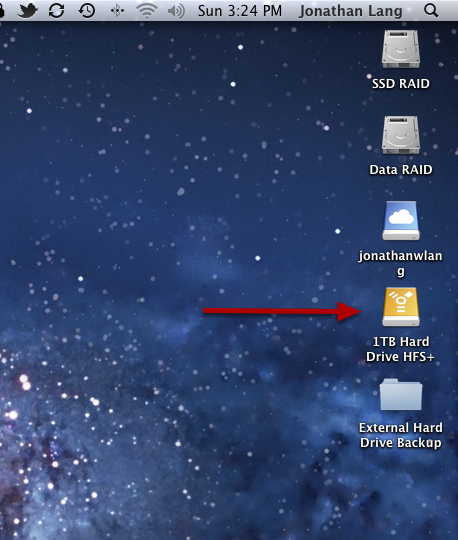
Connect the external drive as you normally would to a Mac computer and wait a few seconds as the drive spins up. If you need to, create a backup of the files by creating a new folder on your desktop, and then copying ALL the files from your external drive into this folder. This may take considerable time and take up some space, but this space can be regained after the formatting process is done.
Launch Disk Utility
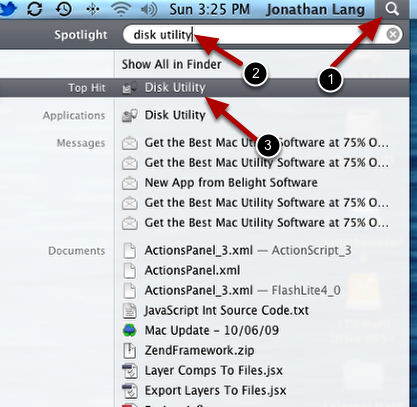
Disk Utility is Apple’s built-in tool for working with hard drives (and USB sticks). You can find it inside the Applications folder in a separate folder called “Utilities”. I prefer to just click the spotlight icon (the top right magnifying glass) and type in “disk utility”. After a short moment it should show up. Click on Disk Utility to open it.
The interface
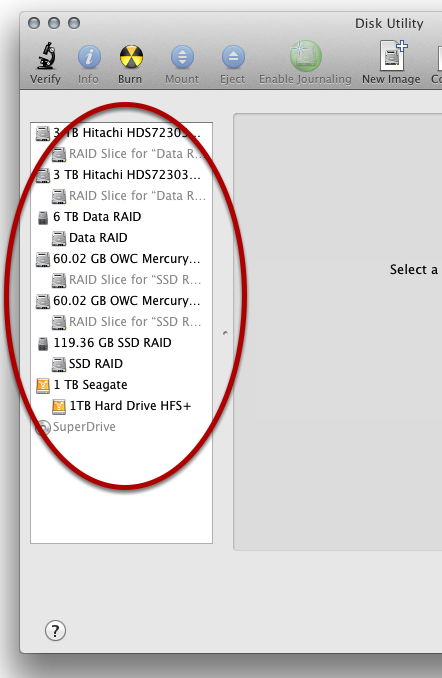
Once the application launches, you should be presented with something similar to the picture above. Most people won’t have as many icons in the left hand pane (I have a lot of drives connected to my computer). Most people will see their Macintosh HD and their external drive. The external drive will normally have an orange icon.
Select the drive to be formatted
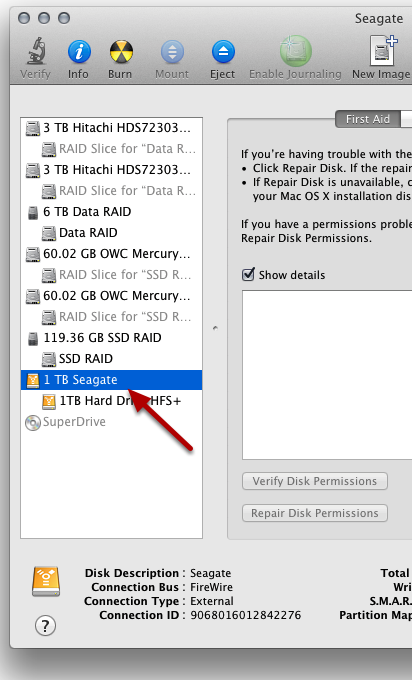
Click on your external drive as I have in the above screenshot.
IMPORTANT: make sure you select the correct drive or you could risk accidentally deleting all your data!
Go to the erase tab and choose FAT
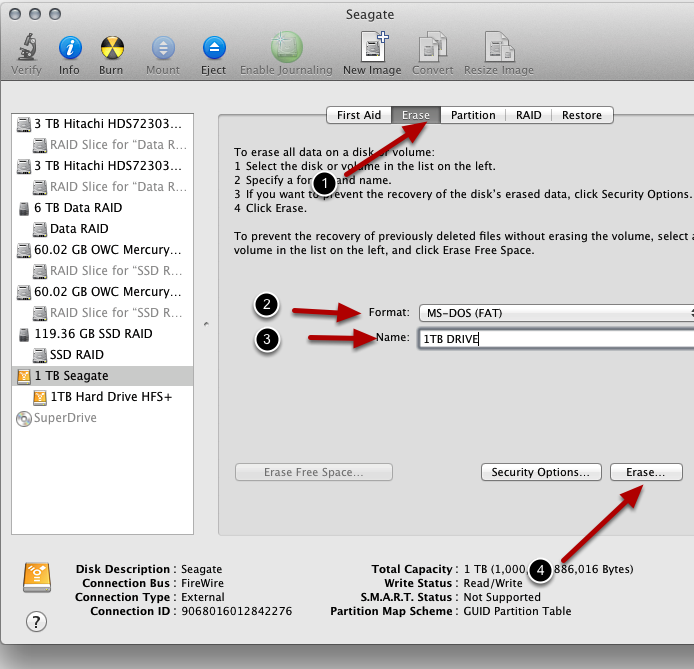
After choosing the drive you wish to format, go to the erase tab and then click on the drop down menu next to “Format”. You will be presented with several options. Choose “MS-DOS (FAT)”. Finally, give your drive a name, and then click the “Erase…” button.
Confirm the erase procedure
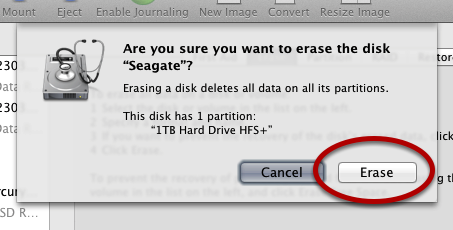
You will be presented with a confirmation asking if you’re sure you wish to erase this drive. Once you are sure, press “Erase”.
Wait a moment…
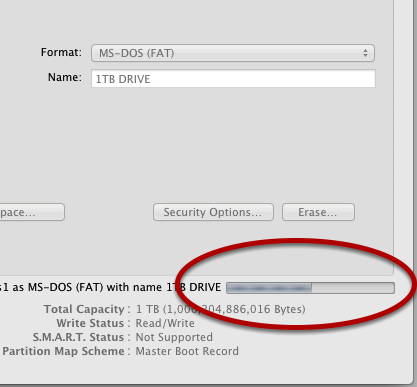
Disk Utility will go through and do it’s thing. You’ll see a progress bar in the bottom right corner showing you how far through it is. Formatting for the most part shouldn’t take more than a few seconds.
Confirm the format
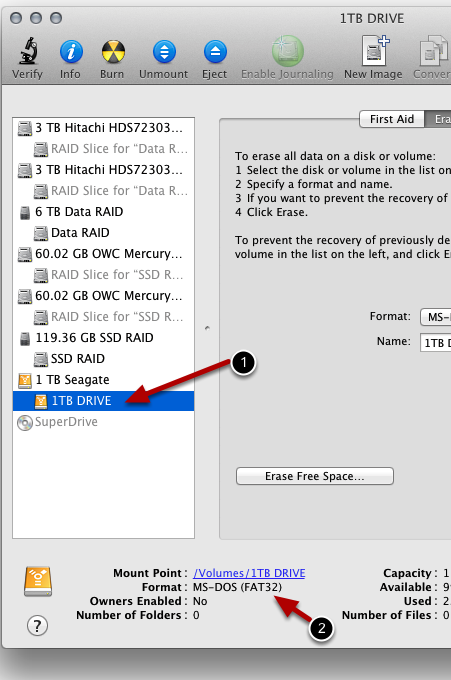
Click on the icon below the top most of your drive (as seen in the picture above). Once you’ve selected this, you should be able to see the Format details down the bottom left. It should now say “MS-DOS (FAT32)”.
If you do in-fact see this, you can quit (close) Disk Utility. Your drive should now allow you to read and write files to it on both your Mac and Windows computers. If you made a backup of important files earlier (hopefully you did), you can now copy them back onto your external drive!
