
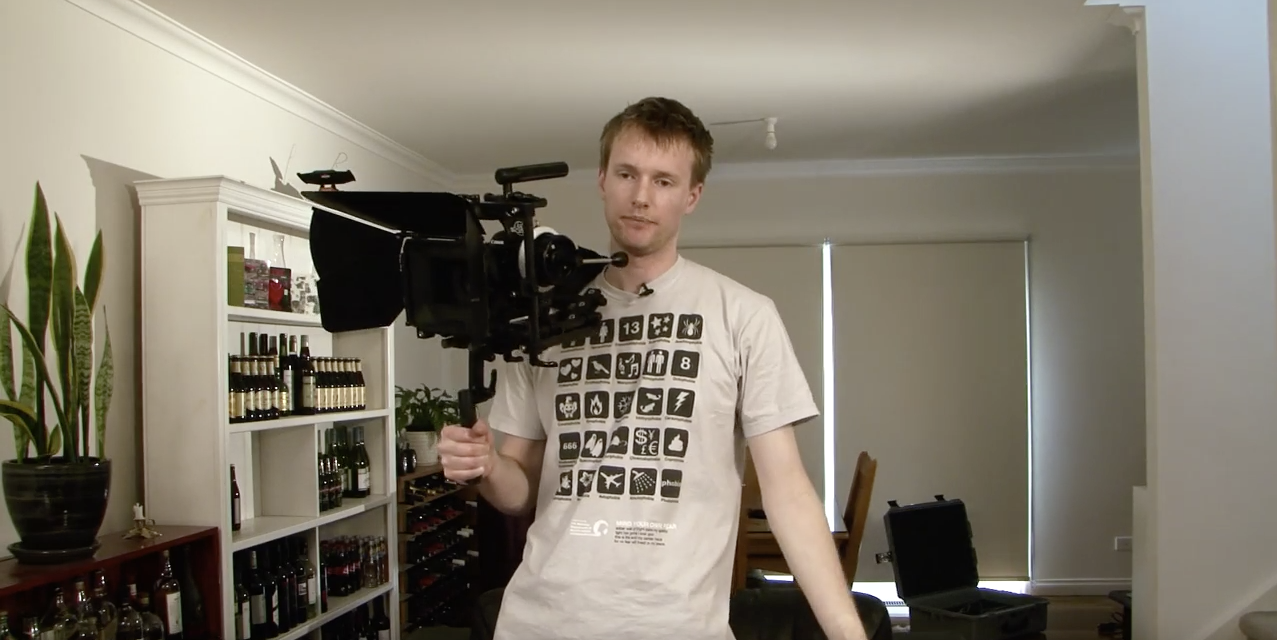
We recently got in a Cinevate DSLR camera rig at my workplace and I decided to put together a quick overview video to step students through its basic use. This rig is based off the core package (more info here) with the additional shoulder mount, (link here) and counter weight, (link here).
I thought I’d post it here too as it may be useful for people researching these rigs (and there are lots avaialble) and for those who’ve had the chance to hire one out for a short period and want to get up to speed quickly. I’m using a Canon 5D mkII, but this rig can be used with any SLR that shoots video. It can also be used with some video cameras.
Why would you want to use an SLR to shoot video? Low light, nice depth-of-field effects, lens choice and (relatively) low cost. The big downside is audio. You need either separate audio recording facilities, or a more elaborate mic/amp setup.
Please keep in mind that this is not the only way you can setup this rig. There are thousands of possibilities from which to choose from. Because of this, the rig can be a little daunting on first inspection, so this is a “default” setup to get you up and running. Once you’re comfortable with this setup, then you can start to explore other ways in which the rig can be used.
Additional video guides can be found here and here.
If you have any comments or questions, please post them in the comments.

[url=http://www.brandiwc.com/brand-36-copy-0.html]ガス針表その寒さ、耐高圧、堅固な精確な特徴、人類の極限スポーツにも優れた性能。エルメススーパーコピー1960年5月25日午前4時20分、針に伴うガス表王富洲など中国登山隊員を実現した初の東北から稜線登って標高8848メートルのエベレストの夢を発揮し、上質な夜光機能、正確に記録した神聖な歴史時刻を北麓から登頂世界人類屋根の快挙。[/url]
[url=http://www.bagkakaku.com/vuitton_bag/2/N41100.html]は素晴らしい万「FUN」の型の表をシンクロ以外にも、Swatch香港区開設の首の間の旗艦店を開店し、強力な販売網を構築。スーパーコピーブランドMr . Kevin Rollenhagen衆がナンシーだと、城の女神イケメンを鳴らす式獅子舞形にでき、一緒に巨大な「どら」にし、新しい自動車ボール砲杖、百の水素気球すぐさまゆっくりと打ち上げて、象徴「Swatch利園山道旗艦店」が開幕し、城人衆潮、VIP貴賓やメディア代表として出席して、一緒にこの腐表壇新話。[/url]
[url=http://www.msnbrand.com/goods-copy-4778.html]ジェイコブスーパーコピー 火星の本バージョンでは、プロットのとても多くがちょうど彼の機転によって生き残るためにしようとしです、彼の周りの材料と若干の非常に素晴らしい問題解決スキル。サバイバリストジャンル映画とショーは本当に人気があります、そして、そのカテゴリーの範囲内(ゾンビの添加なし)、火星の優れた「もっともらしい」話の将来の生き残りの近くの惑星火星の上にあります。だから私はそれを見ることについてかなり興奮ですとだけ言っておこう。[/url]
[url=http://www.ooobag.com/wallet/louisvuitton/index_7.html]として2008年の北京オリンピックに敬意を表し、オメガ「2008年の北京オリンピックの毎日の限定版」の時計は北京五轮の開催期間限定発売。はオリンピックの開幕日2008年8月8日から8月24日まで、このコレクションシリーズ毎日限定発売88だけ。[/url]
[url=http://www.ooobrand.com/bags/list_9_32.html]今年は実力で優勝したチームはたくさん本を含め、アイルランド隊。ヨーロッパツアー第2位の罗里・マイクロイ(Rory McIlroy)が今年は格莱姆・麦克道尔(Graeme McDowell)コンビ代表アイルランド出陣。20歳の罗里・マイクロイは現在、世界ランキング10位。[/url]