
This document will guide you through the steps of creating a LAMP VM to run the Concrete5 CMS. While Concrete5 can be setup on a Windows based server (WAMP for example) it is not a supported or recommended configuration. Generally Concrete5 should be installed on a Unix/Linux system. Following this guide will take you through the steps to first create a virtual machine, then install Linux onto this virtual machine (in this case, Ubuntu 10.10). It will then walk you through the process of getting Apache, MySQL and PHP installed and configured as well as PHPMyAdmin for easy database creation. It will demonstrate how to install an FTP server and setup an account and how to upload the Concrete5 CMS. Finally it will go through the database setup and installation of the Concrete5 system. The other advantage of the method described is that everything used is free or open source, so no registration keys to worry about and nothing to buy.
As you work through this guide, you will be asked to create several usernames and passwords. Make sure you remember these. You can often use the same passwords to make things easier. This isn’t the most secure method, but we are aiming for ease of use her rather than creating a bullet proof setup. Please do not use this guide if you intend to create a server to put on the internet. This is designed as a guide for a local testing server only. There are many other ways a similar setup can be achieved, my main aim here is to do it in the quickest and easiest way.

This tutorial was created and tested using the following:
VirtualBox version 4
Ubuntu version 10.10
Concrete5 version 4.1.1
It may work with other versions but this has not been tested.
This setup will mimic many web hosting plans and allow you to work locally on your site before uploading it to the web. Having the site hosted in a virtual machine allows easy portability between systems, and means that you don’t need to be running a server on your work machine all the time. When you have finished development, you can move the site to where ever you have it hosted. This link may assist with the move.
Finally, this guide may look rather daunting in length. It shouldn’t take nearly as long as it may first appear to get through it. I’ve detailed nearly every step of the way with screenshots, so relax, it’s mostly pictures! Full guide after the break.
1. Download Ubuntu
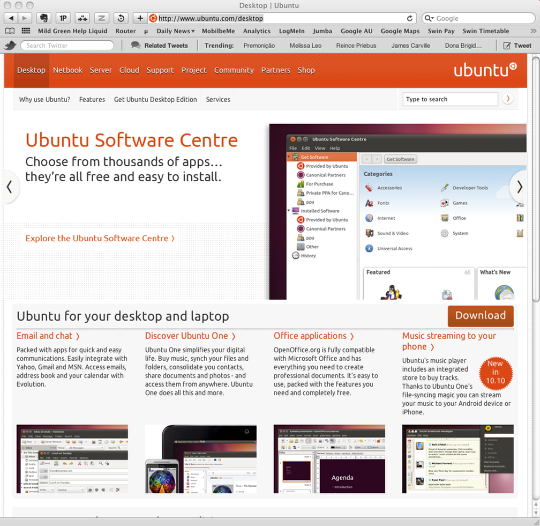
Visit http://www.ubuntu.com/desktop and click on “Download”. Choose “Ubuntu 10.10” and “32-bit”. Then click “Start Download”. This will take time as the download is around 720Mb. As described in the introduction, this process may work with newer versions of Ubuntu, but has only been tested on 10.10 at the time of writing.
2. Download VirtualBox
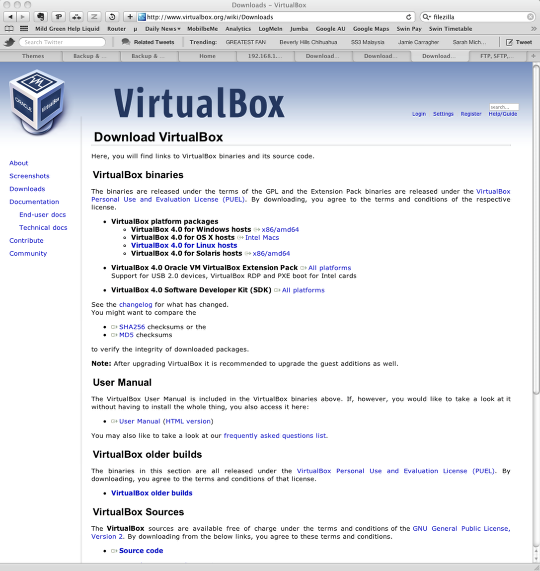
Visit http://www.virtualbox.org/wiki/Downloads and select the version of VirtualBox that supports your system (Windows, Mac etc). Once this has downloaded, go through the installation process. (This is not shown here as it is different for different platforms).
3. Start VirtualBox
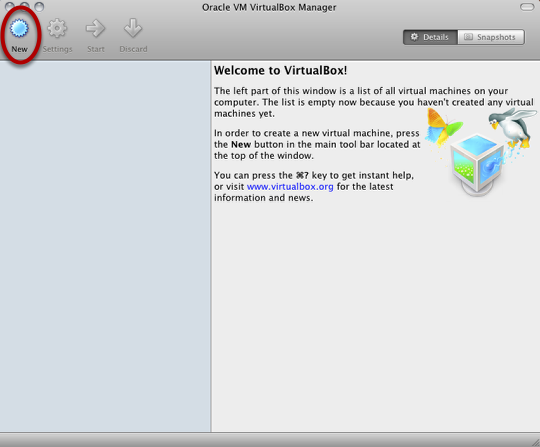
Launch VirtualBox and click the “New” button
4. Specify the Operating System
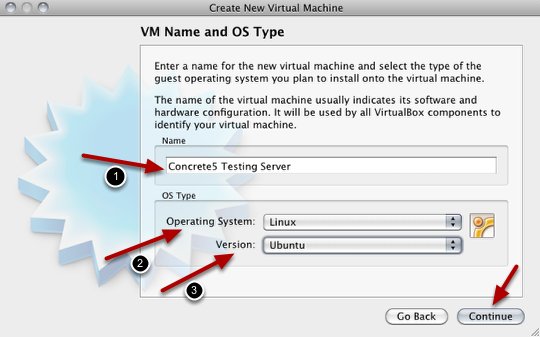
Enter a name for your virtual machine. Choose “Linux” as the Operating system and “Ubuntu” as the version. Click “Continue”.
5. Specify Memory
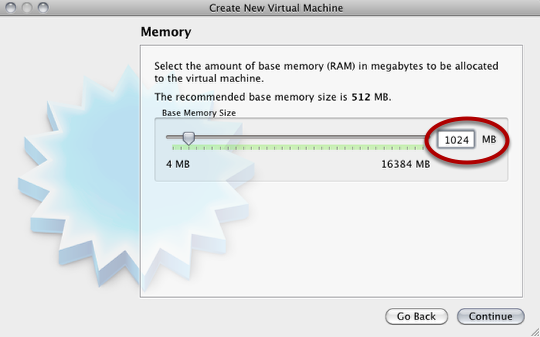
Decide on the amount of RAM you want to allocate to your virtual machine. The minimum is 512MB. If your system has enough RAM (4GB+) allocate 1024MB. Click “Continue”.
6. Setup the Hard Drive
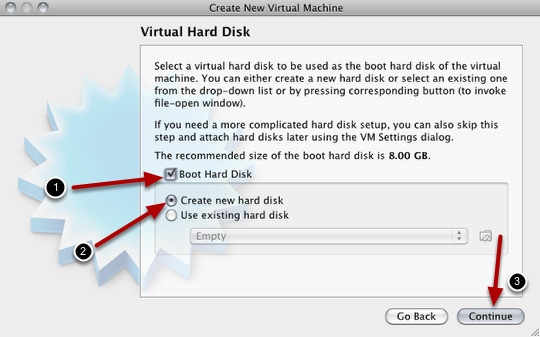
Make sure the above options are checked and click “Continue”.
7. Hard Drive Storage Type
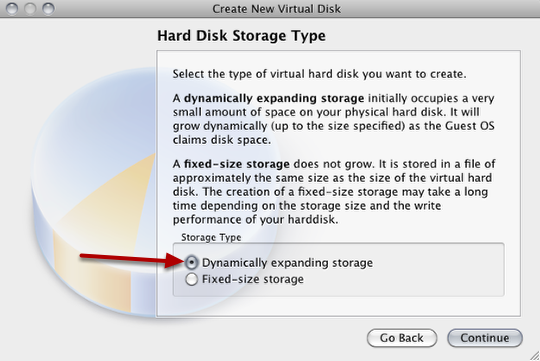
Choose “Dynamically expanding storage”, then press “Continue”.
8. Specify Drive Location
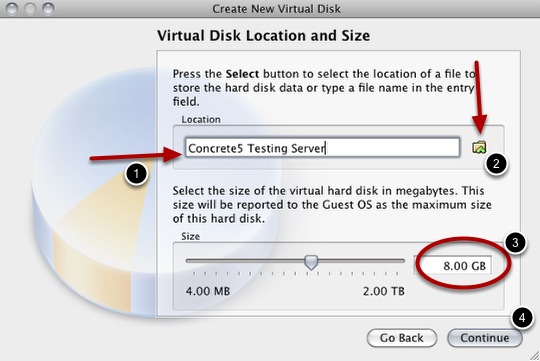
Name the drive and specify the maximum size of the disk. The default works fine here. You can also specify WHERE you save the virtual machine’s hard drive by clicking the yellow folder icon. Click “Continue”.
9. Summary
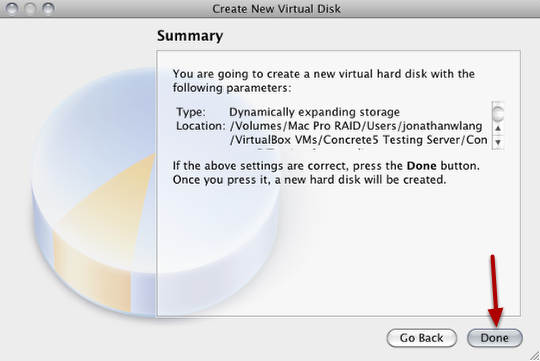
You’ve be presented with a summary of the actions. Click “Continue”. On the next screen, click “Done”.
10. Change Settings
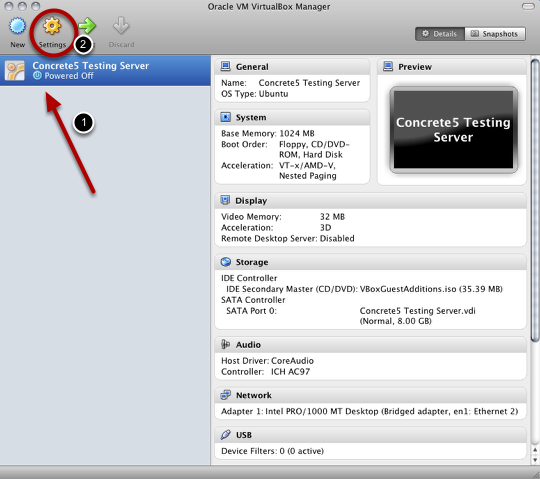
Select your new virtual machine and click “Settings”.
11. Setup Network Adaptor
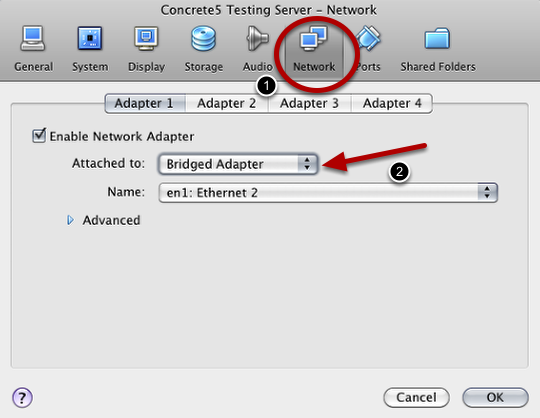
Click the “Network” tab and change the “Attached to:” section to “Bridged Adapter”. Ensure the “Name” is the network interface you use to connect to the internet. This will allow the virtual machine to access your network and the internet. Press “OK”
12. Start the VM

With your virtual machine selected, click “Start”.
13. Information DIalogue
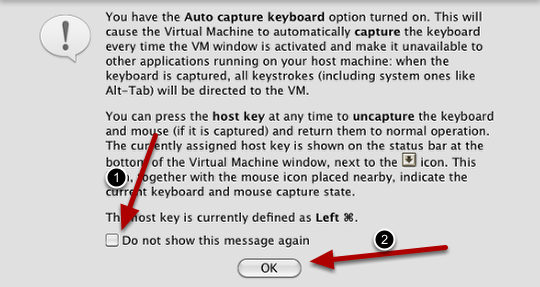
Choose “Do not show this message again” and click “OK”.
14. First Run Wizard
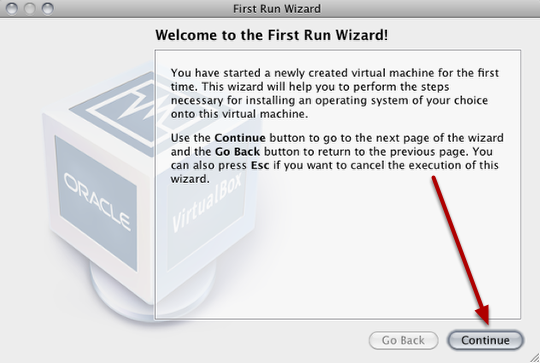
This will give you a quick overview of the first run process. Click “Continue”.
15. Select Install Media
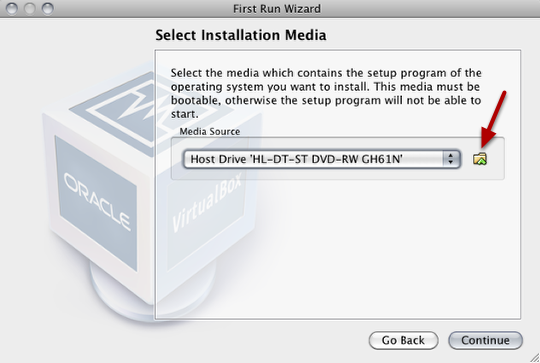
By default, VirtualBox will use your physical optical drive. We need to change this to the Ubuntu ISO we downloaded earlier. Click the yellow folder icon.
16. Choose ISO
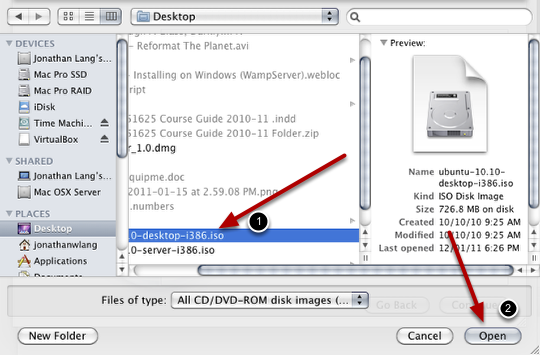
Locate and select the Ubuntu ISO you downloaded earlier.
17. Installation Media Part 2
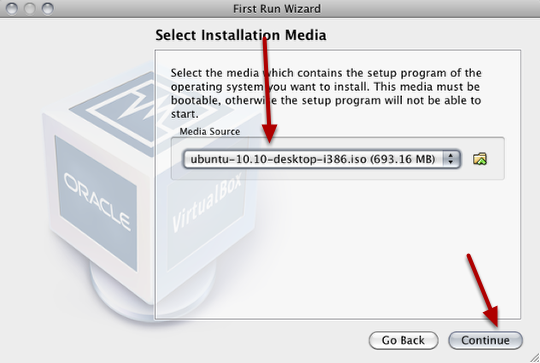
The media source should now specify the Ubuntu ISO, click “Continue”.
18. Summary
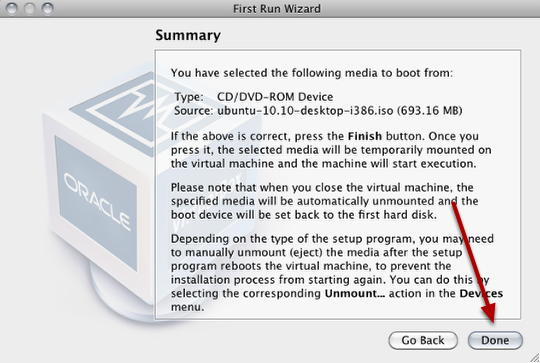
Click “Done”.
19. Ubuntu Install
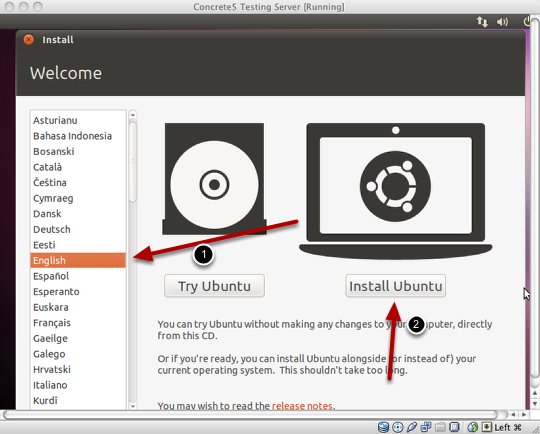
The machine will now boot from the Ubuntu ISO. The initial installation screen will pop up. Choose your language and select “Install Ubuntu”.
20. Optional Installs
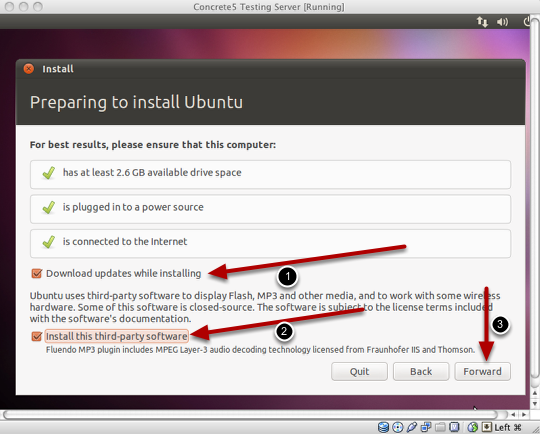
Select “Download updates while installing”. You can also select “Install this third-party software” if you intend to use the VM for any media purposes. Click “Forward”.
21. Allocate Space
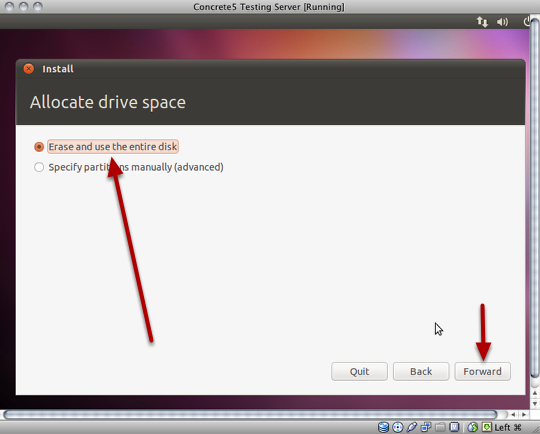
Choose “Erase and use the entire disk”. Then click forward. This will NOT erase your physical computers hard drive, only the virtual machines hard disk.
22. Select Drive
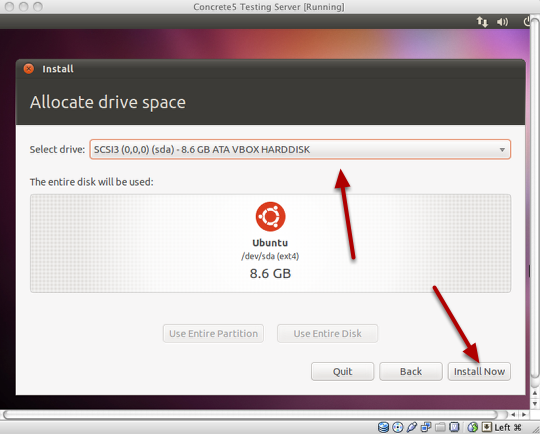
Accept the default here and click “Install Now”
23. Installation Progress
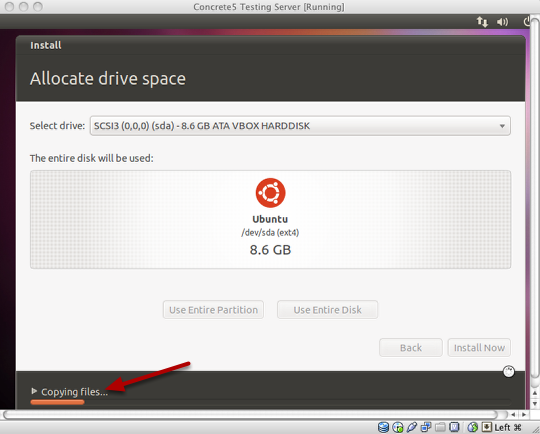
You should now see the install progress bar begin to move. This may take some time. Go grab a coffee.
24. Specify Your Location
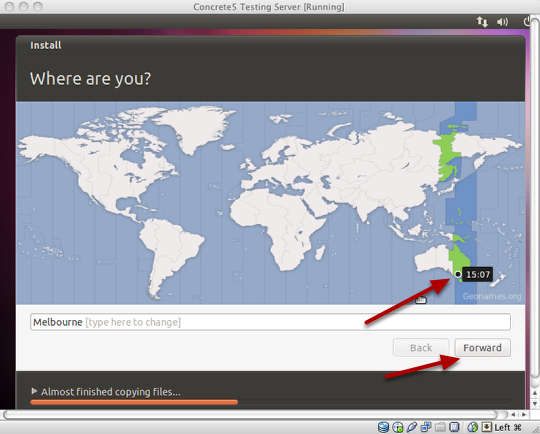
Select your location and click “Forward”.
25. Keyboard Layout
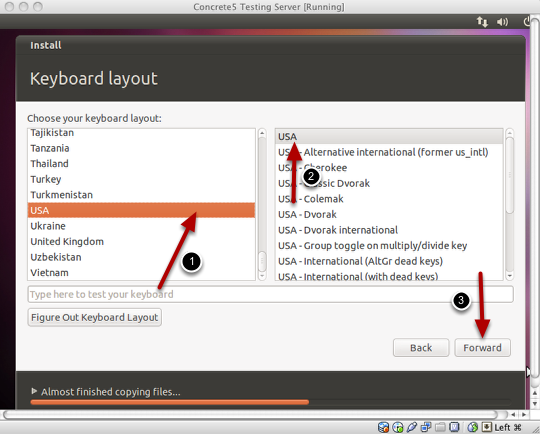
Choose “USA” for your keyboard layout (unless you know it should be something else).
26. User Setup
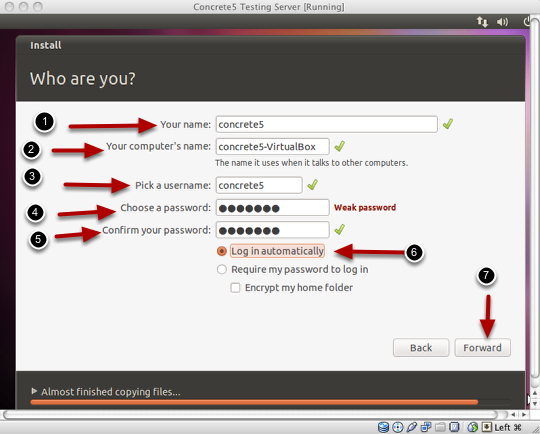
Enter your name (or as I’ve done here, concrete5). Choose a username and a password. Make sure you remember these details. Choose “Log in automatically”. Click “Forward”.
27. Install progress
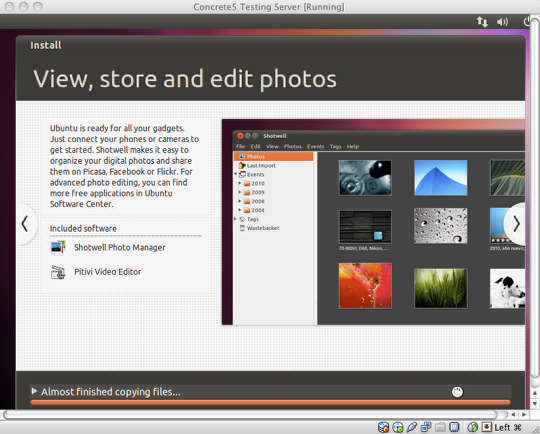
Ubuntu will go ahead and finish installation and setting up your account.
28. Installation Completion
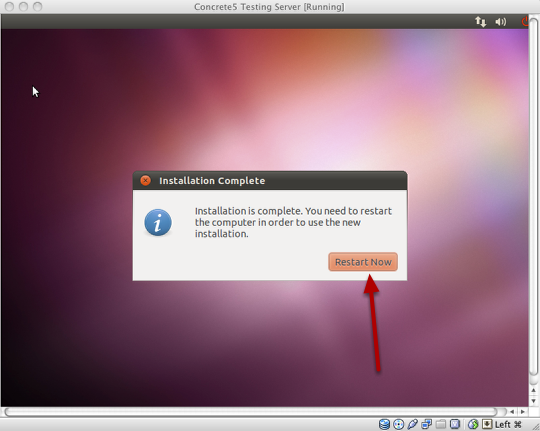
Once Ubuntu has finished the install process, click “Restart Now”.
29. Ubuntu Desktop
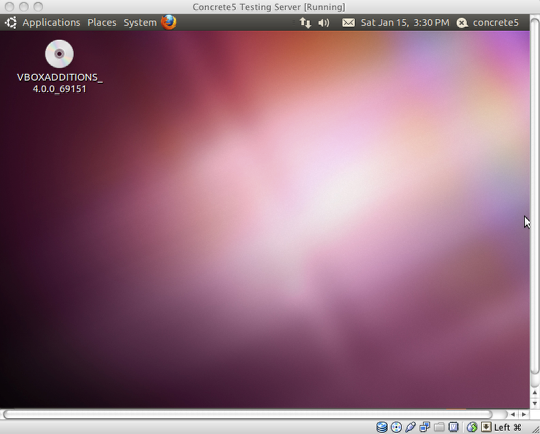
Upon restarting you should be presented with this screen. This is the default desktop.
30. Install Guest Add-ons
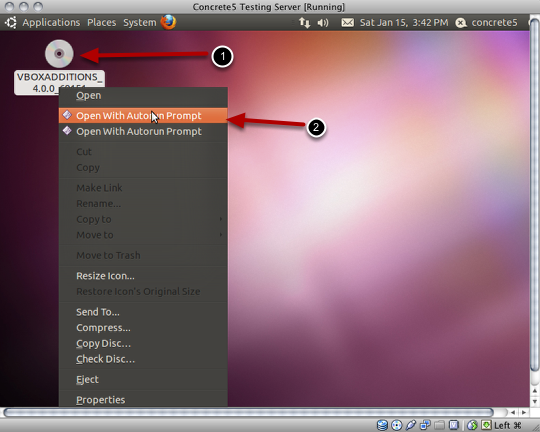
Right click on the disk icon on the desktop and choose “Open With Autorun Prompt”. This will install some add-on software to make your virtual machine faster and easier to use. If you don’t see this disk icon, choose “Install Guest Add-ons” from the VirtualBox “Devices” menu.
31. Install confirmation
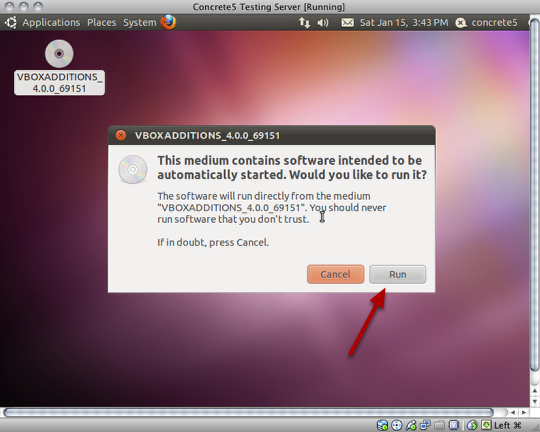
Click “Run” to continue. It will request your password to complete the process. Once you’ve installed the add-on software, restart the machine. (By clicking the power icon in to top right of screen and choosing restart)
32. Start the LAMP install process
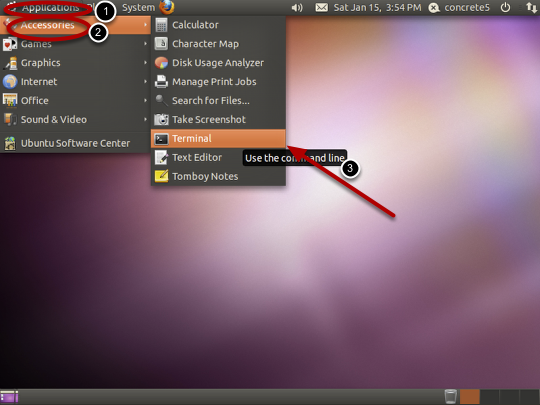
Click “Applications”, then “Accessories”, then “Terminal”. The terminal application may look a little scary, but it will allow us to quickly install several packages for our server.
33. Terminal
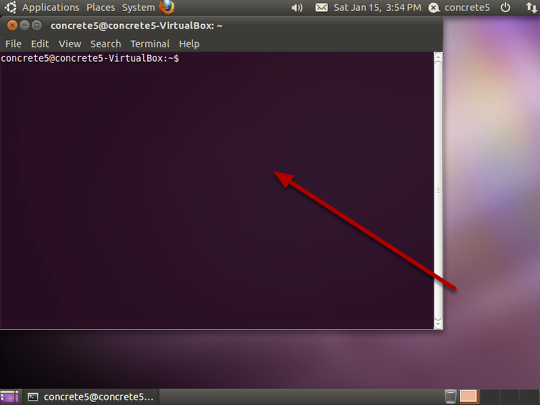
This is the default prompt you should see upon launching terminal. The exact text will change depending on your machine name you specified earlier.
34. Install LAMP
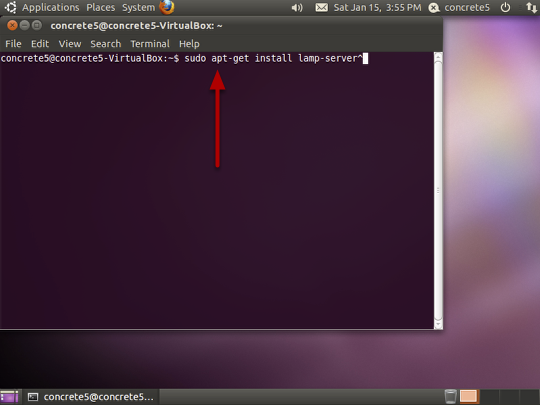
Type “sudo apt-get install lamp-server^” and press return. Be sure to include the “^” or it will not work.
35. Installation progression
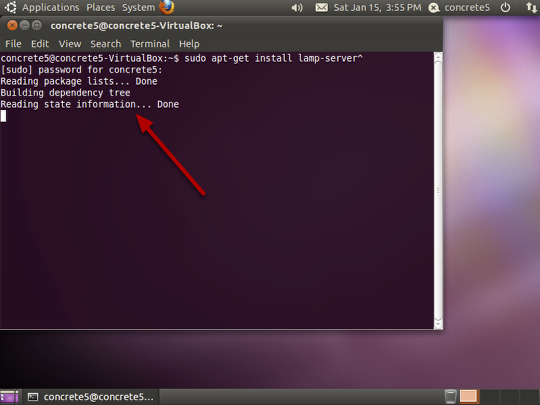
You won’t see a progress bar like you may be used to in Windows or Mac OS. Instead the terminal window will spit out text information about the progress of the install.
36. Configure MySQL server
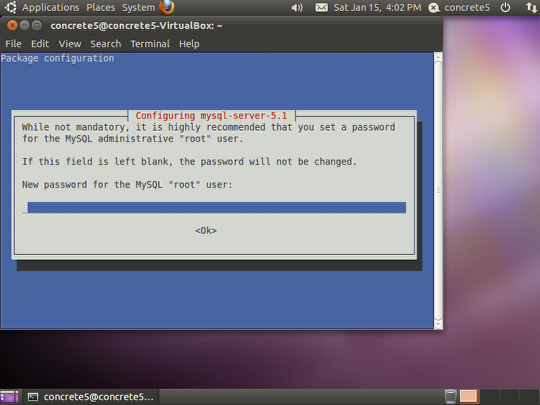
Specify a password for MySQL. Don’t forget this password!
37. Confirm Password
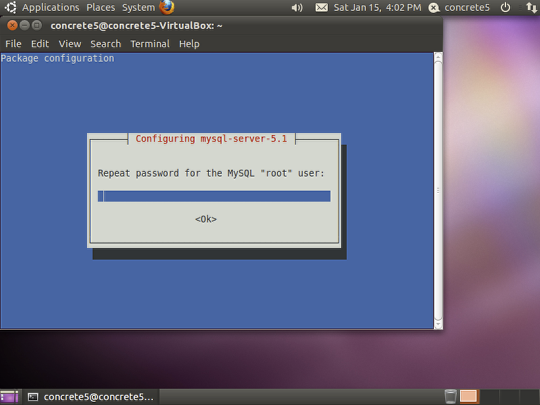
Retype this password to confirm. Again, make sure you don’t forget this.
38. Testing the Install
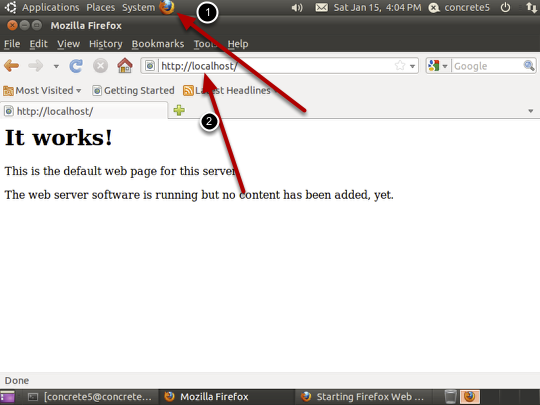
After the terminal window finishes installing the LAMP packages, you can test the installation of Apache by going into Firefox (the orange icon at the top of the screen) and typing in “localhost” and pressing enter. You should see the page above.
39. Test PHP is Properly Installed
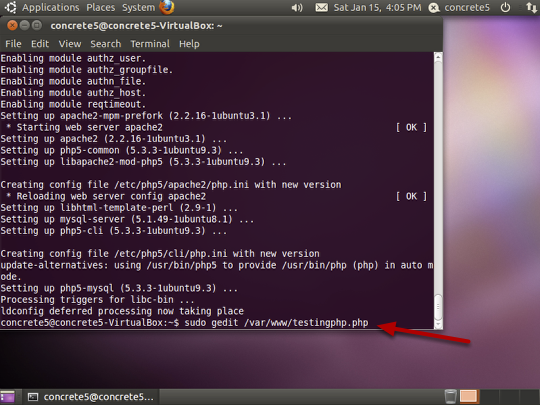
Go back into the terminal. Type “sudo gedit /var/www/testingphp.php” and press enter. This will create a new file on our server called “testingphp.php” and open a text editor.
40. Create PHP Test Code
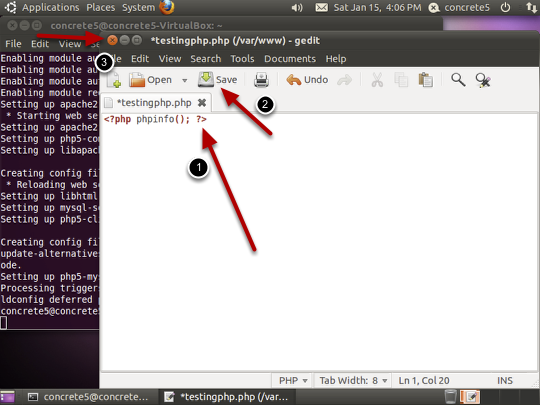
Type “<?php phpinfo(); ?>” and then save and close gedit.
41. Restart Apache
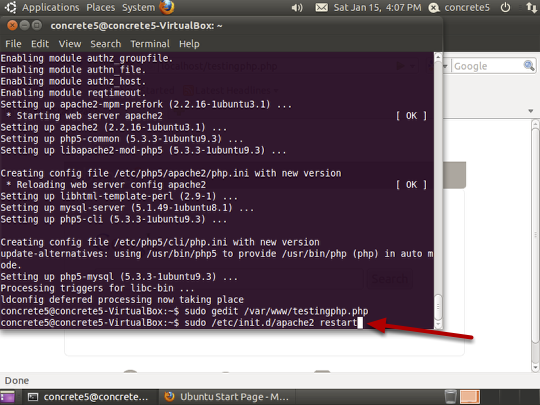
Type “sudo /etc/init.d/apache2 restart” and press enter. This will restart the Apache server.
42. Test PHP is working correctly
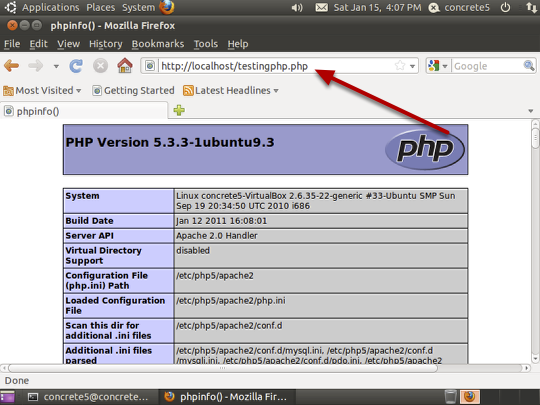
Open Firefox and visit: http://localhost/testingphp.php” If you get the page shown above then PHP is functioning correctly.
43. Install PHPMyAdmin
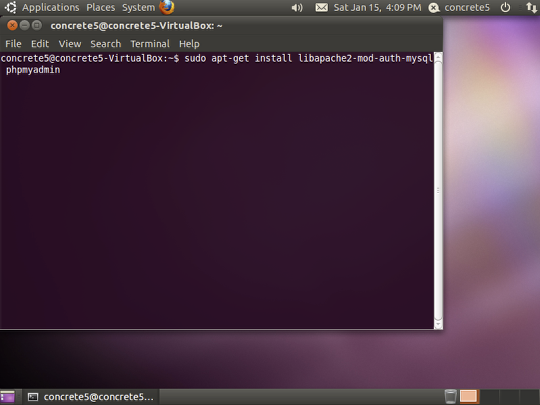
Go back into the terminal and type “sudo apt-get install libapache2-mod-auth-mysql phpmyadmin”. This will download and install PHPMyAdmin making adding databases a little easier. It may ask for your password and confirmation for installation. Enter these details when prompted.
44. Configure PHPMyAdmin
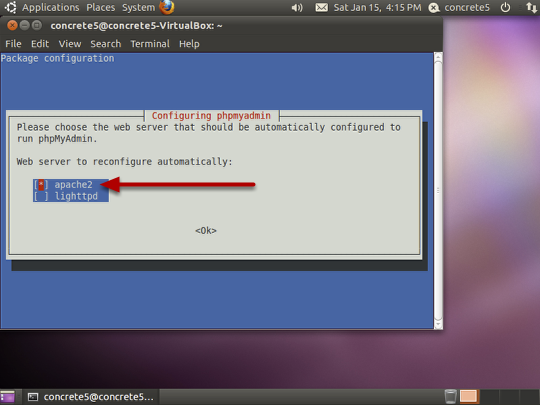
Move to curser so it is next to the “apache2” option, press the spacebar to select this option and then press enter.
45. Further PHPMyAdmin Configuration
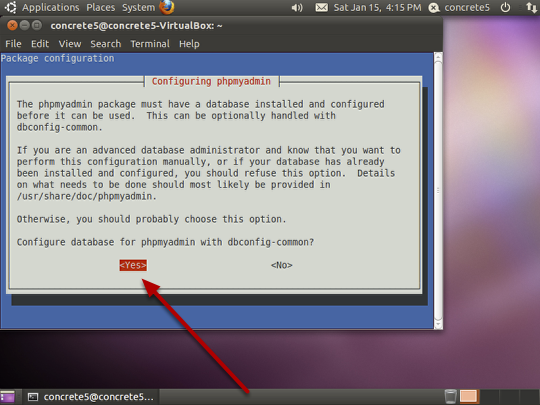
On the next screen choose “Yes”.
46. Configuring a Password
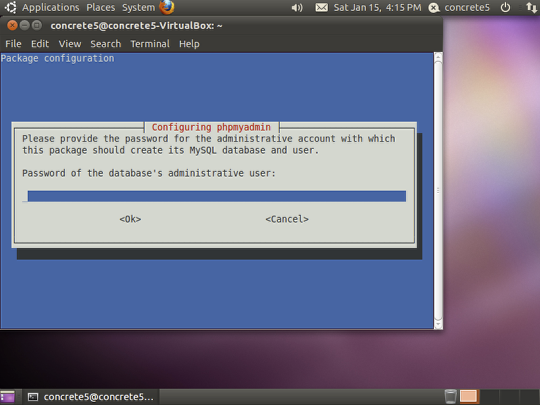
Enter a password for the database’s admin user. Don’t forget this password! Press enter to confirm.
47. Configuring a password part 2
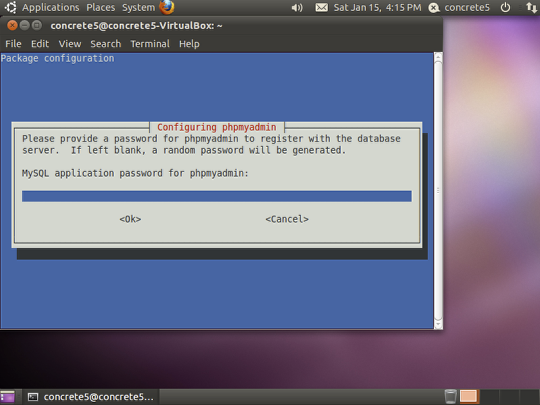
Enter a password for the database server. You can use the same password as in the previous step if you wish. Press enter after entering.
48. Confirmation
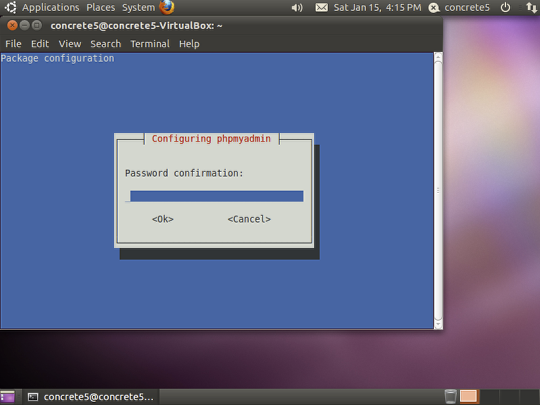
Confirm this password and press enter again.
49. Testing PHPMyAdmin
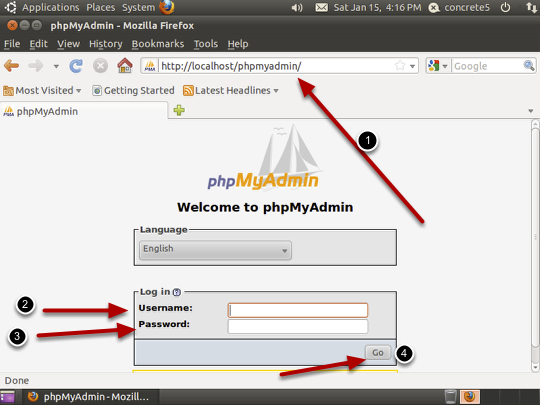
Load up Firefox and visit http://localhost/phpmyadmin to check PHPMyAdmin is working correctly by logging in. Here you can enter a username of “root” and the password you created in the previous steps to gain access. If you can login successfully you can now close the Firefox window.
50. Install an FTP server
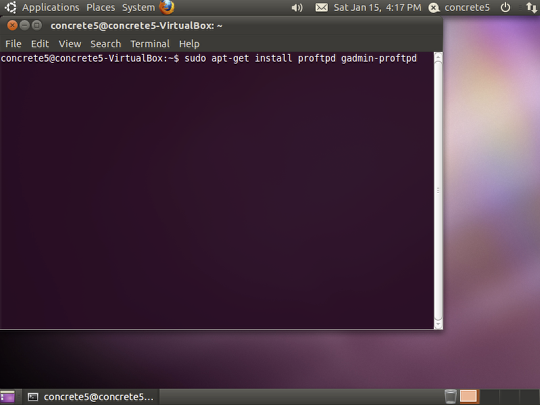
Switch back to the terminal and type “sudo apt-get install proftpd gadmin-proftpd” This will download and install an FTP server so you’re able to connect to the VM server via FTP and upload files.
51. Confirm Install
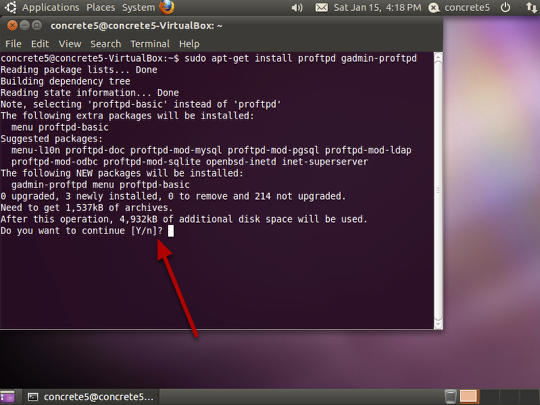
When prompted, press “y” and then hit enter.
52. FTP Configuration
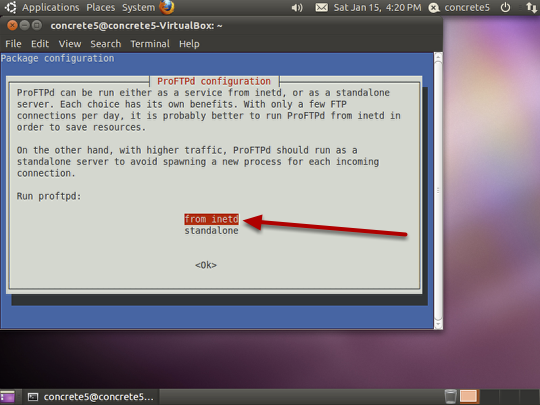
Choose “from inetd” and press enter
53. FTP Configuration Part 2
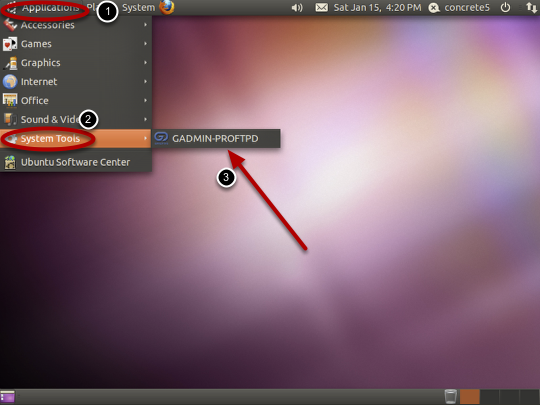
Go into the “Applications” menu and down to “System Tools”. Click on “GADMIN-PROFTPD”
54. Password Confirmation

Enter your password and press “OK”.
55. FTP configuration
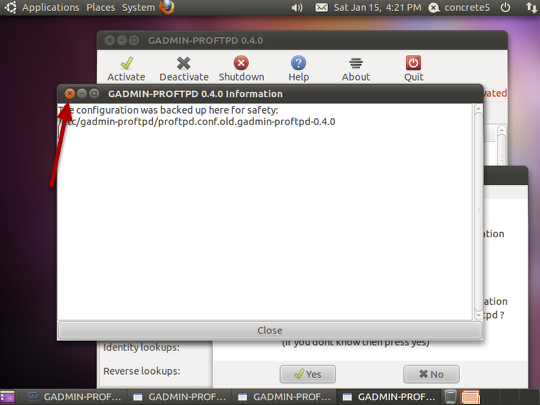
Close the information window you are presented with
56. FTP Configuration
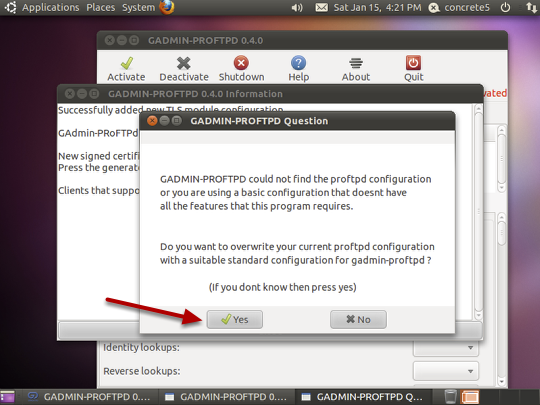
Click “Yes” to continue.
57. FTP Configuration
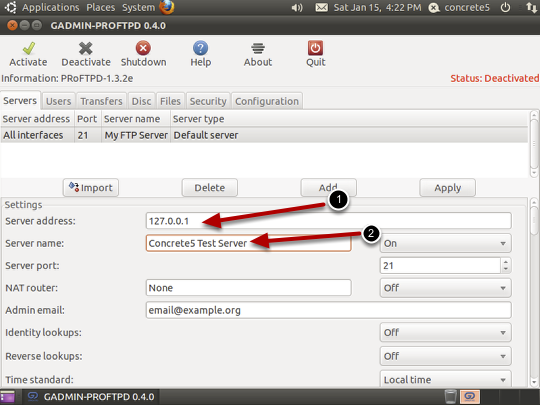
Enter “127.0.0.1” in the server address (localhost). Give the server a name (this can be anything). You can enter your email here if you wish.
58. FTP Configuration
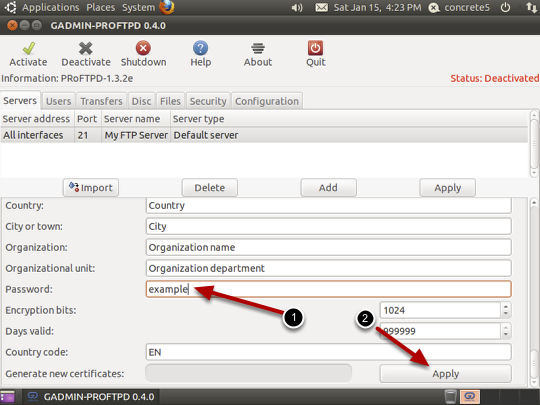
Scroll down to the bottom and enter a password. Address details are optional. Press “Apply”.
59. Confirmation

You should get a confirmation message letting you know you have been successful.
60. User Setup
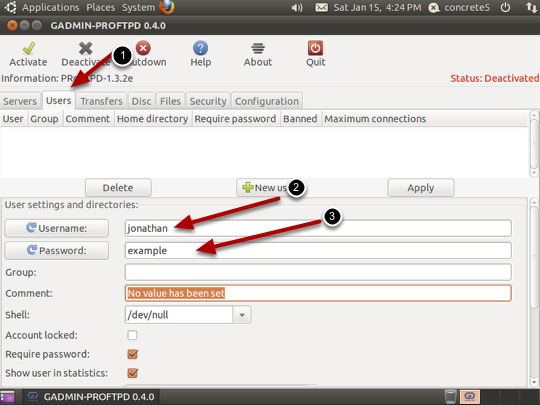
Click on the “Users” tab. Enter a name for the username and a password.
61. Add Server Directory
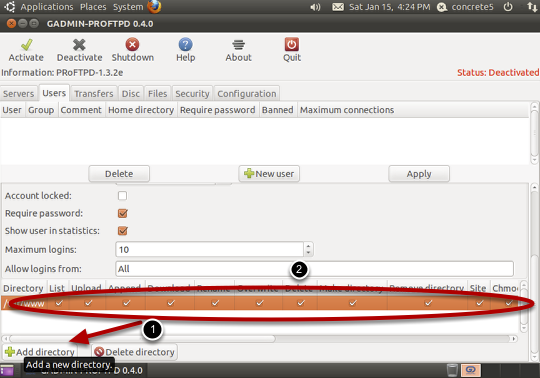
Scroll down and click “Add directory”. Navigate to “www” and then choose “Open”. Tick all the options available (List, Upload, Append, etc)
62. Confirm User
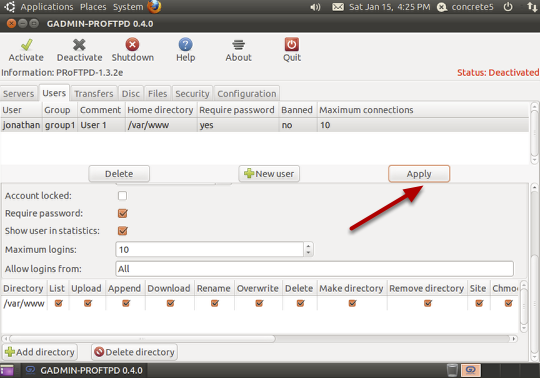
Click “Apply” to confirm your settings
63. Activate Server
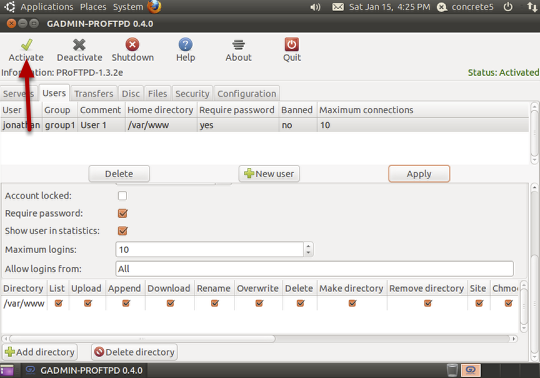
Click on “Activate” in the top left to launch the server.
64. Find your machines IP Address
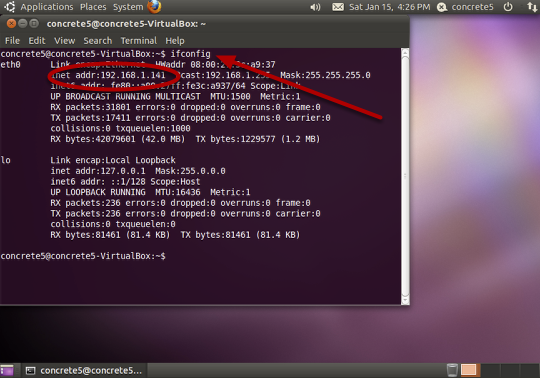
Open the terminal and enter “ifconfig”. This will read out your network setup. Look for the machines IP address – “inet addr:” This is the address you can use to connect via FTP to this machine. If you’ve made it this far, well done! You’ve replicated a similar setup to many web hosts. We can now use this as a testing platform for Concrete5 and many other CMS systems. By default this IP is dynamic, meaning it could change. If you find you can’t connect, simply run the “ifconfig” command from the terminal again to double check the IP address. If you’re on a small network, this will rarely change. If you wish to make the IP static so it never changes, go to the “System” menu, choose “Preferences” and then “Network Connections”. Under “Wired”, double click on “Auto eth0”. Click on the “IPv4 Settings” and change the method to “Manual”. Click “Add” and then enter your IP, Netmask and Gateway. This setup will depend on your home network. If you’re unsure, it may be best to skip this step and just note down the IP address given via the “ifconfig” command earlier.
65. Get Concrete5
Switch back to your normal computer (Windows or Mac). Be sure to leave VirtualBox open in the background as we will be connecting to it. You can also connect to the virtual machine we’ve just created from another computer or laptop on your network.
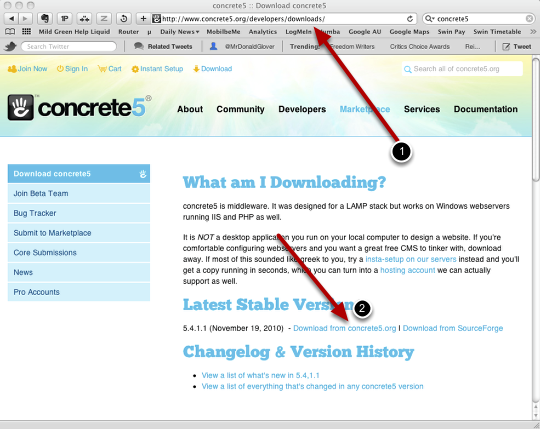
Visit http://www.concrete5.org/developers/downloads
Choose “Download from concrete5.org” to download a zip archive containing the Conrete5 CMS
66. Extract
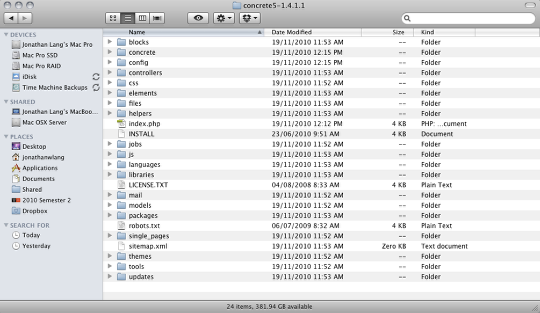
Extract all the files to a temporary directory. (some browsers will do this automatically for you)
67. Connect Via FTP
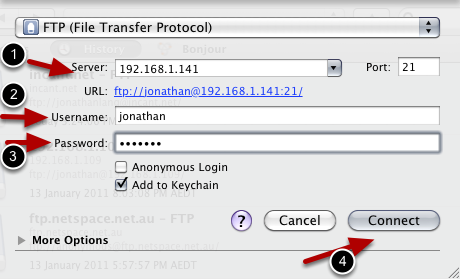
Load up your FTP of choice and connect to the virtual machine by entering the IP address we discovered earlier, and entering the username and password we created when setting up the FTP account.
If you don’t have an FTP program, two popular options are:
Mac: Cyberduck – http://cyberduck.ch/ (used in the screenshots here)
Windows: Filezilla – http://filezilla-project.org/
68. Successful Connection
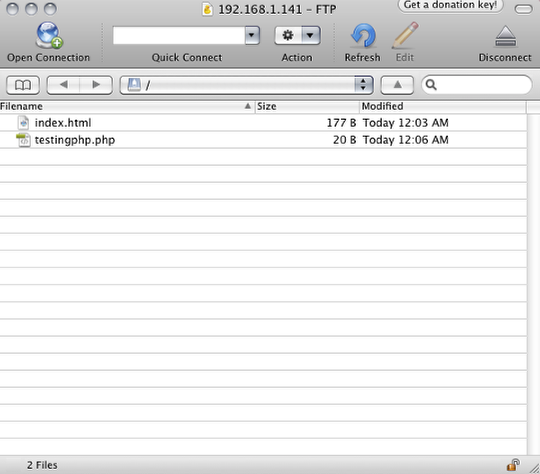
If you’ve entered the correct details, you should see two files. The index.html file (which is a default test file), and “testingphp.php” which we created earlier to test PHP was working. You can delete both of these if you wish now.
69. Upload Concrete5
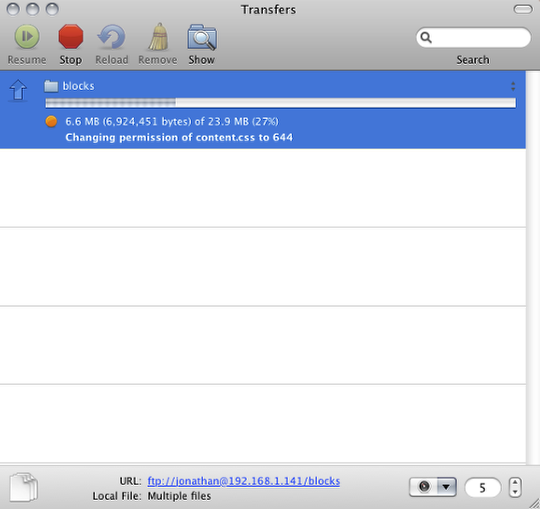
Upload everything in the Concrete5 folder we downloaded and extracted earlier. The exact method varies from FTP program to program, but generally you can drag and drop the files. This upload process may take a few minutes due to the large number of files.
70. Create a Database for Concrete5 to Use
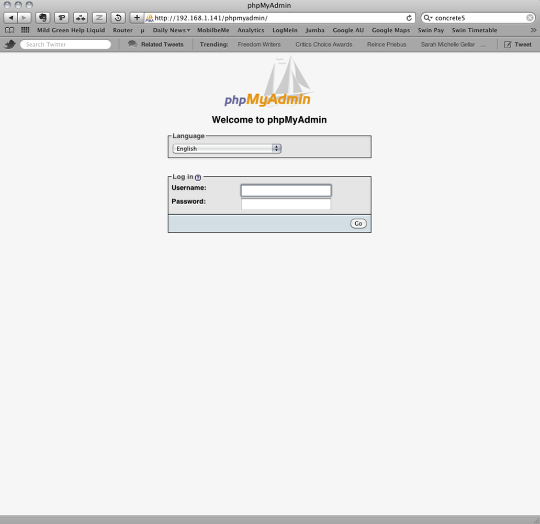
Go to the virtual machines IP address /phpmyadmin in a web browser (http://<ipadddress>/phpmyadmin). This will take you to the login screen you may have seen earlier. Enter a username of “root” and your password you created earlier.
71. Database Setup
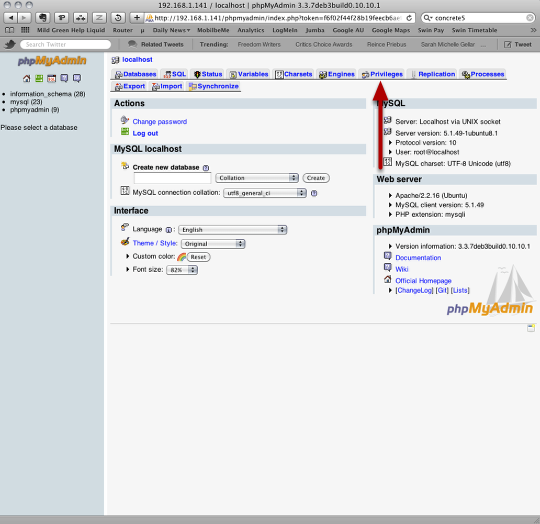
Click on the “privileges” tab.
72. Database Setup Part 2
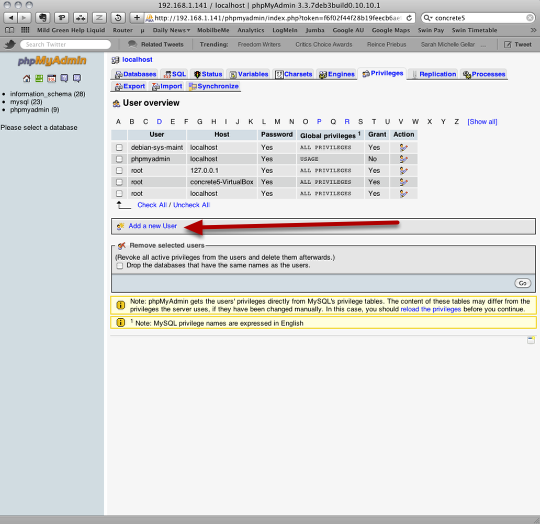
Click “Add a new User”
73. Database Setup Part 3
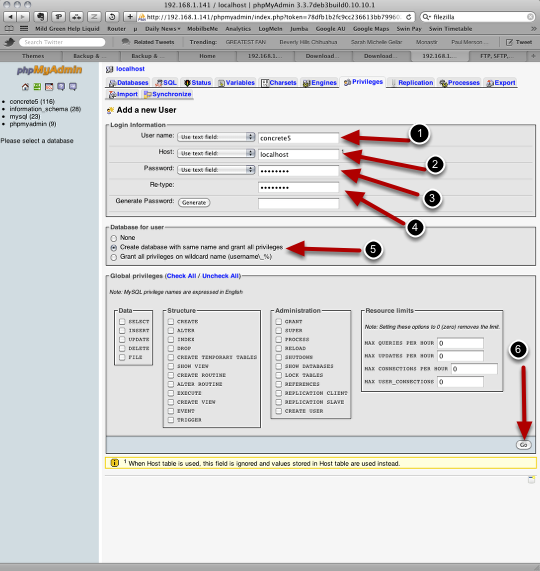
Enter a username (again, make sure you remember this!). Enter “localhost” as the Host. Enter a password and confirm it. Check the radio button “Create database with same name and grant all privileges”. Finally, press the “Go” button. This will add a new user, create a database with the same name and apply the appropriate privileges all in one step.
74. Visit the Concrete5 Page

Enter http://<vm_ip_address> into your browser to get to the Concrete5 setup page (i.e., http://192.168.1.141). Before we setup Concrete5, it will ask we change access to a few directories as shown above. To do this we need to use a function known as “CHMOD”. You can do this through your FTP program.
75. CHMOD Directories
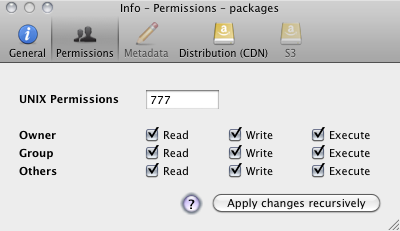
This process will be different for different FTP programs. The general process however is to select the directory or file who’s permissions we wish to modify, choose “get info” (or similar) and then change the files permissions by entering a three digital number (or checking some boxes). For the “config”, “packages” and “files” folders, enter “777”. For the “htmldiff.py” files (which can be folder in the concrete/libraries/3rdparty folder) enter “755”. To check the changes have been successful, click “Run Tests Again” on the Concrete5 install page.
76. Setup Concrete5
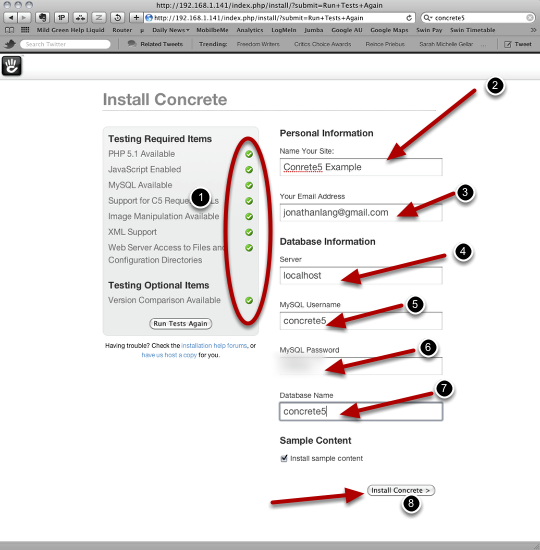
Enter the name of your site and your email address. Under the database information, under server enter “localhost”. For the MySQL username, enter the name you created using PHPMyAdmin. Enter the password and database name (the database name and username should be the same if you followed the steps in the PHPMyAdmin section above). Click “Install Concrete”.
77. Success! (hopefully)
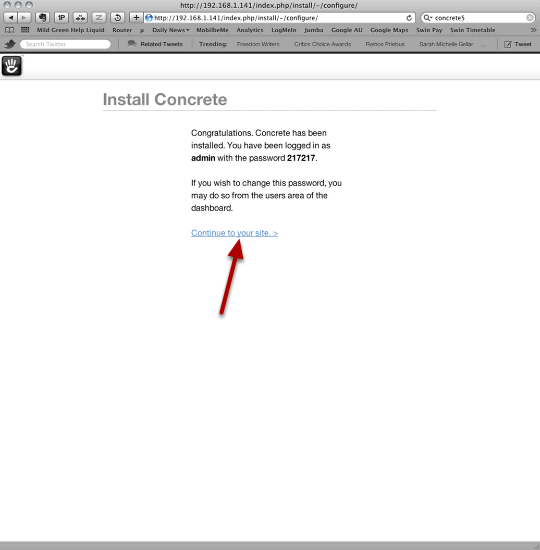
If things have gone smoothly, you should see a success page with a password. We will change this password in a moment. Click “Continue to your site”.
78. Concrete5 page
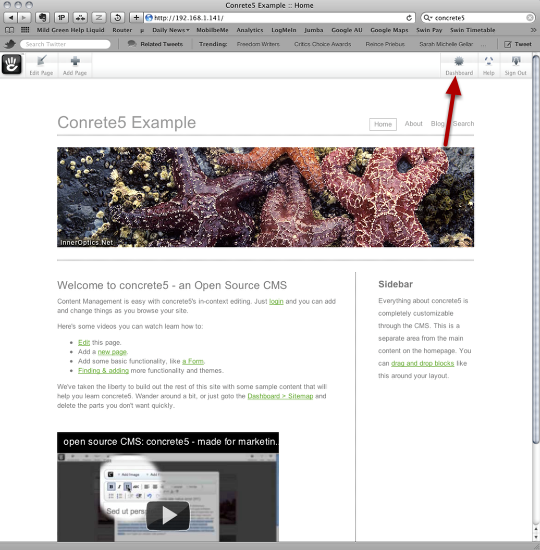
You should now see the default Concrete5 page. Click “Dashboard” up the top right.
79. Dashboard Overview
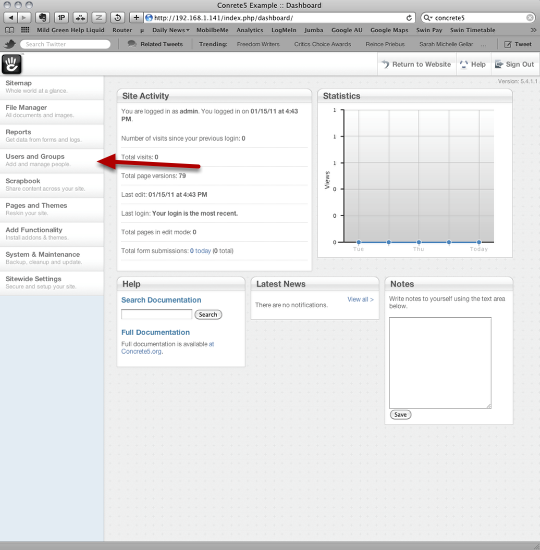
This is the dashboard where we can change a lot of the “backend” features of the site. One of the nice things about Concrete5 is that a normal editor of the website doesn’t have to see this, but it contains all the more powerful functions for a administrator or web developer. Click on “Users and Groups”.
80. Change Admin Password
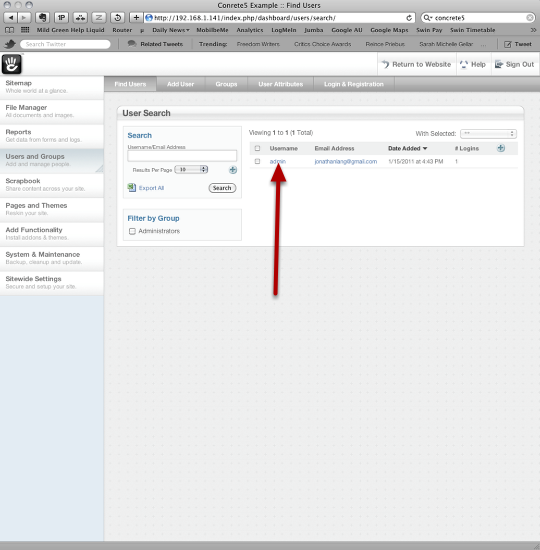
Click on the “admin” username.
81. Edit User
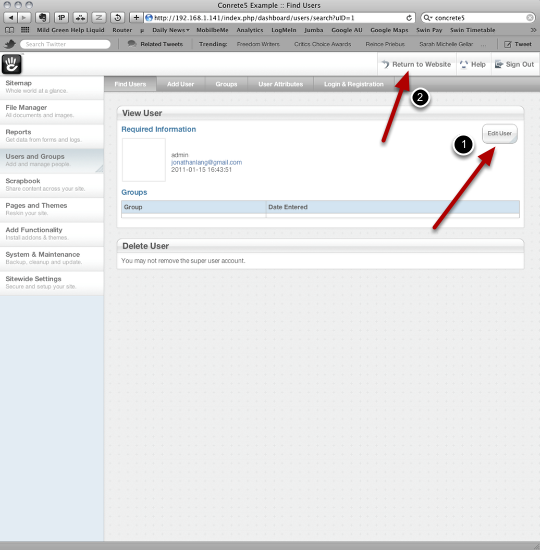
Click the “Edit User” button. This will allow us to change the password. In the next page, enter a new password and confirm it in the “Change Password” section of the table. Click “Update User” when finished. Then click on “Return to Website”.
82. Concrete5 usage
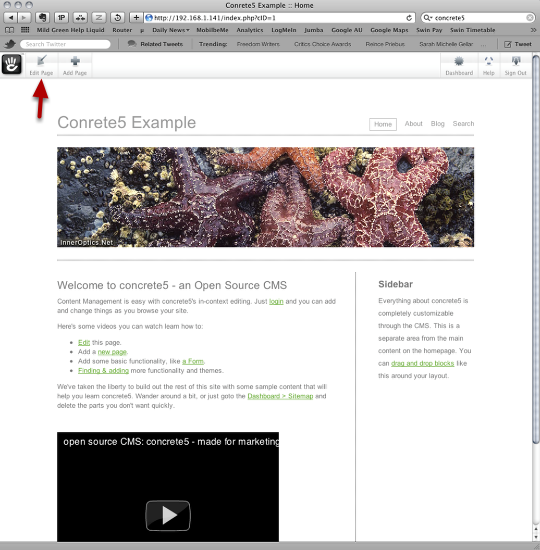
Now it’s time to have a play with Concrete5’s interface. It will take a little time to learn, but as you’ll discover very quickly, Concrete5 is very easy for “normal” people to use to update content on a site. Click “Edit Page” to put the CMS into editing mode.
83. Editing the Site
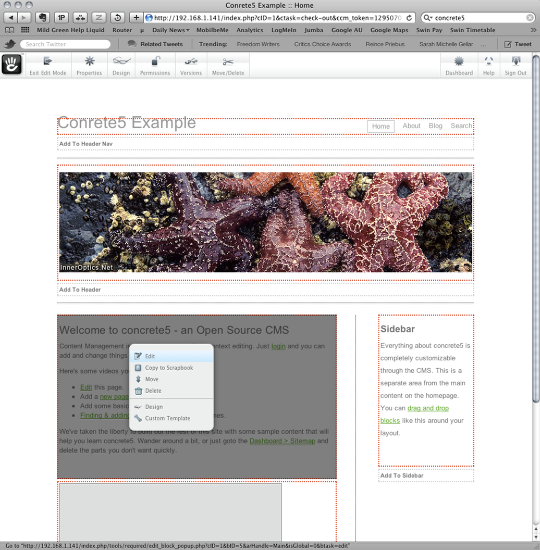
You’ll see red bounding boxes around all editable regions. If you click on any of these regions, you’ll get a popup menu allowing you to edit, move, delete or make other changes to a section.
Be sure to read the help files for further guidance to the Concrete5 interface. Experimentation is the best way to learn. I started from scratch 48 hours before writing this guide and I’m still learning, but it’s a pretty straightforward system and this guide will hopefully get people on the right track! Remember all changes you make here are contained within the virtual machine you created, so don’t worry about messing things up. If anything goes horribly wrong you can just recreate another virtual machine and try again.
If you find any errors in this guide, or have any suggestions, please let me know by leaving a comment below.

Step 43: the command should be sudo apt-get install libapache2-mod-auth-mysql phpmyadmin. auth not autho. Other than that, fantastic guide!
Thanks Kevin, now updated!
What do you do? nude lolita bbs preteen because he is extremely racist and there is nothing he hates than to see a black girl with a white guy.
What a great website this is! This post was amazing! Keep it up!
Wszyscy, którzy w klubie Å›ledzimy Twoje zmagania rozumiemy, że teraz jest najtrudniej. Teraz masz tylko jednego przeciwnika – siebie. Wierzymy, że z nim wygrasz. A zgodnie z naszÄ… opiniÄ… już wyr‚›ÅgeÅa.Ci, którzy też nie lubiÄ… pÄ™dzlowania wody.